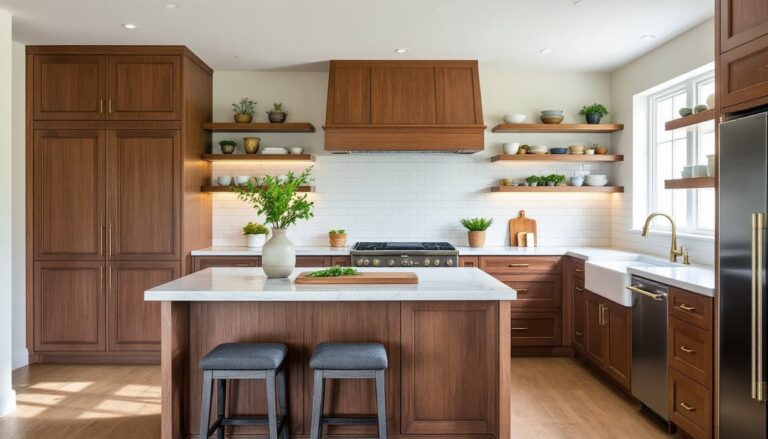

Planning a kitchen remodel used to mean hours at a design center, flipping through laminate samples and sketching on graph paper. Now, homeowners can visualize cabinets, countertops, and appliance layouts from their couch. Online kitchen design tools have evolved from clunky room planners into sophisticated software that renders photorealistic 3D models, flags code violations, and even generates material lists. Whether you’re sketching a budget refresh or mapping a full gut renovation, digital design platforms let you experiment without committing to a single nail.
Table of Contents
ToggleKey Takeaways
- Online kitchen design tools enable homeowners to visualize layouts and catch costly mistakes before construction begins, saving thousands in professional design fees.
- Accurate measurements, software choice matching your project scope, and testing the work triangle are critical to successful online kitchen design planning.
- Free tools like IKEA Kitchen Planner and SketchUp Free work for simple projects, while paid platforms ($50–$2,995) offer advanced features like precise lighting simulation and material calculations for complex renovations.
- Common design mistakes—ignoring actual product dimensions, overlooking clearances, and neglecting ventilation requirements—can be prevented by verifying specifications and reviewing 3D renderings from multiple angles.
- Always validate digital designs with real-world checks like measuring diagonally for out-of-square rooms and taping cabinet outlines on the floor to confirm spacing and traffic flow feel right.
What Is Online Kitchen Design and How Does It Work?
Online kitchen design is a web-based or app-based process that lets users plan and visualize kitchen layouts using digital tools. Most platforms follow a similar workflow: measure the existing space, input dimensions, place walls and windows, then drag and drop cabinets, appliances, and fixtures into a floor plan. Advanced tools render the design in 3D, showing how light falls across quartz countertops or how a peninsula affects traffic flow.
Some platforms are fully DIY, users handle every measurement and placement decision. Others offer hybrid models where homeowners draft the initial layout, then a designer refines it remotely. Many software packages pull from manufacturer catalogs, so the upper cabinets you’re placing on-screen match actual product SKUs from brands like KraftMaid or IKEA.
The technical side varies. Browser-based tools (often WebGL or HTML5) require no installation but may lack features found in downloadable software. Desktop programs offer more rendering power and offline access, useful when Wi-Fi is spotty in a basement workshop. Mobile apps work for quick edits but aren’t ideal for precision work, entering a 10’3″ wall dimension on a phone keyboard is tedious.
Most tools export floor plans as PDFs or image files. Higher-end platforms generate cut lists, material tallies, and even electrical plans showing outlet and fixture locations per NEC standards. Some integrate with retailers, letting users order cabinets or tile directly from the design interface.
Benefits of Designing Your Kitchen Online
Cost savings top the list. Professional design services run $500 to $3,000 depending on scope. Free or low-cost software eliminates that line item, though it shifts time burden onto the homeowner. Even paid tools (typically $50–$150 for one-time purchases or monthly subscriptions) cost a fraction of hiring a kitchen designer.
Iteration speed matters when decisions hinge on cabinet depth or island overhang. Moving a range in software takes seconds: moving a gas line after drywall is up costs hundreds. Homeowners exploring kitchen design ideas can test a dozen layouts before framing begins, catching conflicts like a refrigerator door that blocks a doorway or insufficient clearance for a dishwasher swing.
Visualization reduces buyer’s remorse. Seeing a backsplash rendered in actual light conditions, not a showroom vignette, helps avoid the “looked better in the sample” regret. Tools that import real paint colors (Benjamin Moore, Sherwin-Williams) show how cabinet finishes interact with wall tones.
Material accuracy improves budgeting. Software calculates square footage for countertops, linear footage for crown molding, and box counts for tile. A design might reveal that switching from 12×24″ tile to 12×12″ cuts waste by 15%, a detail easy to miss on paper sketches.
Permitting and code compliance get easier when plans are clean. Some platforms flag common violations, like a cooktop without adequate ventilation clearance per IRC Chapter 15, before the building inspector does. Exporting a scaled floor plan to submit with permit applications beats hand-drawing elevations.
Best Online Kitchen Design Tools and Software
Choosing software depends on skill level and project scope. IKEA Kitchen Planner is free and purpose-built for their cabinet system. It’s intuitive but locked to IKEA products, fine for a SEKTION overhaul, limiting if mixing manufacturers. The tool outputs a shopping list with part numbers, simplifying ordering.
SketchUp Free (web-based) offers flexibility. Users model kitchens from scratch or download pre-made components from the 3D Warehouse. It has a learning curve, understanding groups, components, and the push/pull tool takes practice, but it’s powerful for custom builds. The paid SketchUp Pro ($349/year) adds LayOut for dimensioned drawings and better import/export options.
RoomSketcher ($49/month or pay-per-project) balances ease and features. It generates 2D and 3D views, 360° panoramas, and photorealistic renderings. The cabinet library spans multiple brands, and the interface is less technical than SketchUp. It’s overkill for a simple backsplash swap but solid for whole-room remodels.
HomeByMe (freemium) renders high-quality images and supports custom furniture uploads. The free tier limits project saves: paid plans start at $9.99/month. It’s browser-based, so no installation hassle, and the drag-and-drop interface works for beginners.
Chief Architect ($169–$2,995 depending on version) is professional-grade software used by contractors and designers. It handles structural elements, joists, headers, load-bearing walls, and produces construction documents. The interface is dense: expect a multi-hour learning investment. For homeowners tackling complex renovations (removing walls, adding skylights), it’s worth considering. Those using kitchen design software often find Chief Architect in recommended lists.
Free vs. Paid Design Platforms
Free tools work for straightforward projects. IKEA Planner, HomeByMe’s basic tier, and SketchUp Free handle cabinet placement, appliance spacing, and basic rendering. Limitations appear in catalog depth (fewer manufacturer options), export quality (watermarked images), and support (community forums instead of customer service).
Paid platforms justify the cost when precision matters. They offer accurate lighting simulation, real-time collaboration (useful if working with a remote contractor), and detailed material lists. Subscriptions like RoomSketcher or Chief Architect include updates, important as building codes and product lines change.
For a minor refresh (new countertops, paint), free tools suffice. For a $30,000+ remodel involving plumbing relocation or structural changes, paid software reduces expensive mistakes. Some contractors discount design fees if clients provide CAD-quality plans, offsetting the software cost.
Step-by-Step Guide to Creating Your Online Kitchen Design
1. Measure the space accurately. Use a 25-foot tape measure, not a smartphone app. Record wall lengths, ceiling height, window and door openings (width, height, and distance from corners), and any obstructions like radiators or structural columns. Note locations of existing plumbing (sink drain, gas line if applicable) and electrical (outlets, switches, lighting junction boxes). Measure from corner to corner diagonally, if the distances differ, the room isn’t square, which affects cabinet fit.
2. Photograph everything. Shoot straight-on views of each wall, plus detail shots of electrical panels, vent hoods, and utility hookups. These references help when placing appliances in software.
3. Choose your software and start a new project. Input room dimensions. Most tools ask for wall lengths first, then let you add windows and doors. Double-check entries, a typo turning a 10’6″ wall into 16’6″ cascades into layout errors.
4. Place major appliances. Start with the work triangle: sink, range, and refrigerator should form a triangle with sides between 4 and 9 feet (per classic design guidelines, though modern open kitchens often deviate). Refrigerators need clearance for door swing (check if it’s left- or right-hinged). Ranges require 30 inches of clearance from combustibles unless using a code-compliant hood. Dishwashers sit within 36 inches of the sink to simplify plumbing.
5. Add cabinets. Base cabinets are typically 24 inches deep and 34.5 inches tall (36 inches with countertop). Upper cabinets are usually 12 inches deep: height varies (30, 36, or 42 inches). Leave 15–18 inches between countertop and upper cabinet bottom for workspace. Use filler strips if walls aren’t perfectly plumb, better to plan for a 3-inch filler than force a cabinet that won’t fit.
6. Select countertops and backsplash. Standard countertop depth is 25 inches (1-inch overhang past base cabinets). Islands often have 12–15 inch overhangs for seating, which may require corbels or knee braces for support. Software libraries include materials like quartz, granite, butcher block, and laminate, choose based on budget and maintenance tolerance.
7. Plan lighting and electrical. Place recessed cans 24–30 inches from wall cabinets to avoid shadows on counters. Under-cabinet LED strips improve task lighting. Ensure outlets every 48 inches along countertops per NEC 210.52(C). If moving appliances, flag new circuits for the electrician, a range may need a 50-amp 240V line.
8. Render and review. Generate 3D views from multiple angles. Walk through the design mentally: Can two people pass between the island and the stove? Does the refrigerator door block the pantry? Is there a landing zone (counter space) next to the oven for hot pans?
9. Export and share. Save floor plans as PDFs. Print them at scale (e.g., 1/4″ = 1′) for contractor bids. Some homeowners blend digital designs with real-world mockups, taping cabinet outlines on the floor with painter’s tape to confirm spacing feels right.
Common Mistakes to Avoid When Designing Online
Ignoring actual product dimensions. A 36-inch range in software might represent a model that’s actually 35.875 inches or 36.25 inches. Verify specifications on manufacturer sites. Cabinets especially vary, IKEA’s system uses millimeter increments that don’t always align with inch-based layouts.
Skipping the work triangle or ignoring traffic flow. Software won’t stop you from placing the sink 15 feet from the dishwasher or blocking the main walkway with an island. Test paths: if someone’s at the stove, can another person access the fridge without squeezing past?
Overlooking clearances. Dishwashers need 27 inches of open space in front when the door is down for loading. Corner cabinets require 6–12 inches of clearance so adjacent doors don’t collide. Drawer stacks can’t hit each other when opened simultaneously, software won’t always flag this.
Neglecting ventilation. Range hoods must vent to the exterior for gas cooktops (per most codes) and should move 100+ CFM per linear foot of cooking surface. Microwave-hood combos often underperform: if the design relies on one, check CFM ratings.
Forgetting about toe kicks and fillers. Toe kicks (the recessed space at cabinet bottoms, typically 3.5 inches tall) aren’t always auto-generated. Fillers compensate for walls out of square or appliances with non-standard widths. Budget 3–6 inches of filler per run.
Choosing finishes in a vacuum. Monitor colors don’t match real life. Order physical samples of cabinet doors, countertop chips, and tile before finalizing. Many kitchen design guides stress testing materials in the actual space under natural and artificial light.
Not planning for delivery and installation. A 72-inch refrigerator fits in the design but won’t fit through a 32-inch doorway. Consider how cabinets, appliances, and slabs reach the kitchen, especially in older homes with narrow stairs or tight turns.
Underestimating electrical and plumbing changes. Moving a sink 4 feet sounds simple online but may require rerouting drain lines inside a floor joist cavity or cutting into a concrete slab. Consult a plumber and electrician early if the layout shifts utilities significantly.
Conclusion
Online kitchen design tools put professional-grade planning power in homeowners’ hands, turning vague ideas into buildable blueprints. The software won’t swing a hammer or pull a permit, but it sharpens decisions, catches costly mistakes before demolition starts, and gives contractors clear direction. Measure twice, render often, and don’t skip the tape-on-the-floor reality check, screens lie about scale in ways physical space doesn’t.