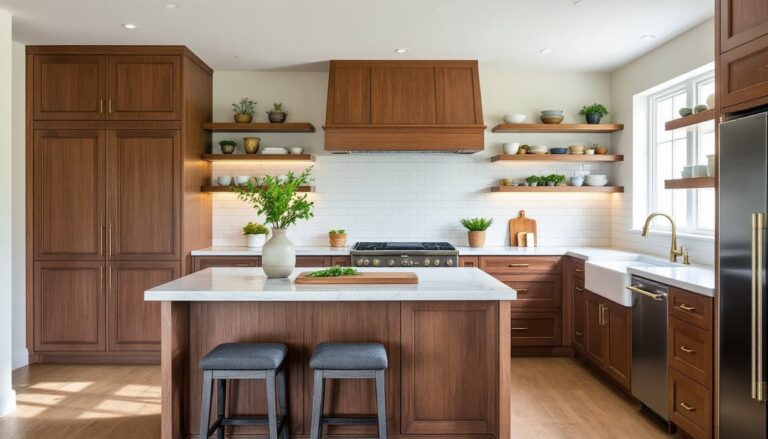

Industrial kitchens aren’t just for restaurants and lofts anymore. The aesthetic, raw materials, open space, utilitarian fixtures, has moved firmly into residential territory, offering homeowners a look that’s equal parts edgy and functional. If you’re drawn to exposed brick, metal finishes, and the kind of honest construction that doesn’t hide behind trim and drywall, this style delivers. But pulling it off takes more than slapping up some open shelving and calling it done. This guide walks through what defines the industrial look, the key elements that make it work, and how to adapt it to a home kitchen without breaking the budget or your back.
Table of Contents
ToggleKey Takeaways
- Industrial kitchen design prioritizes raw, unfinished materials like exposed brick, concrete, and metal alongside open shelving and a neutral color palette of grays, blacks, and earth tones for an edgy yet functional aesthetic.
- Before exposing structural elements in your home, verify local building codes and obtain necessary permits, as removing drywall from load-bearing walls requires compliance with municipal regulations.
- Open shelving is the most budget-friendly way to achieve industrial kitchen design, but requires heavy-duty brackets rated for at least 50 pounds and a commitment to keeping items tidy and dust-free.
- Paint existing cabinets in matte black or charcoal, pair butcher block or concrete countertops with metal fixtures, and add pendant lights with spun metal shades to transform your kitchen without a full renovation.
- Start with high-impact, low-cost changes like swapping hardware, refinishing countertops with concrete overlays, and incorporating reclaimed materials from salvage yards to build your industrial kitchen style incrementally.
- Exposed ductwork, plumbing, and metal accents are design statements in industrial kitchens; use galvanized stovepipe, chromed or black pipe, and powder-coated steel to ensure durability and code compliance.
What Defines Industrial Kitchen Design?
Industrial design traces its roots to converted warehouses and factory buildings where original architectural elements, steel beams, concrete floors, ductwork, were left exposed. That aesthetic translated into residential spaces as a deliberate design choice rather than a budget constraint.
The hallmarks are straightforward: raw, unfinished materials (or finishes that mimic them), open or minimal cabinetry, metal and wood combinations, and a neutral color palette heavy on grays, blacks, and earth tones. Surfaces tend to be matte or brushed rather than glossy. Symmetry matters less than function.
It’s worth noting that true structural exposure, removing drywall to reveal brick or studs, may require permits in some jurisdictions, especially if you’re touching load-bearing walls. Always verify local building codes through your municipality before opening up walls. Non-structural cosmetic changes (swapping cabinet doors, adding metal shelving, refinishing countertops) typically don’t require permits but confirm with your local building department.
The style works particularly well in open-plan homes where the kitchen flows into living or dining areas, but it can also add character to smaller, enclosed kitchens if balanced carefully. The key is maintaining a sense of spaciousness and avoiding visual clutter.
Key Elements of an Industrial Kitchen
Exposed Materials and Raw Finishes
Exposed brick, concrete, and metal are the backbone of industrial kitchen features that define this style. If your home has brick underneath drywall, exposure is an option, but be prepared for dust, mess, and the reality that the brick may not be as photogenic as you’d hoped. Many older homes used common brick (rough, inconsistent) behind walls rather than face brick. If exposure isn’t feasible, brick veneer panels or concrete-look porcelain tile offer a cleaner alternative.
Concrete countertops fit the industrial look but require sealing and ongoing maintenance. They’re porous and can stain if not properly sealed with a penetrating sealer every 1-2 years. Butcher block is another frequent pairing, typically 1.5-inch-thick maple or walnut, that brings warmth without softening the overall aesthetic. Both materials require more upkeep than engineered stone.
Metal surfaces show up in backsplashes, range hoods, and accents. Stainless steel is the go-to for appliances and sinks, but blackened steel, brushed nickel, and oil-rubbed bronze fixtures add depth. If you’re fabricating custom metalwork (shelving brackets, pot racks), mild steel is affordable and weldable, but it will rust without a clear coat or wax finish. Powder-coated steel resists corrosion better and comes in matte black or gray.
Exposed ductwork and plumbing are design statements, not afterthoughts. If you’re running new HVAC or range hood ducting, consider routing it visibly rather than concealing it in soffits. Use galvanized or black stovepipe rather than flex duct for a cleaner look. Plumbing under an island sink can stay visible if you use chromed or black pipe and keep drain lines tidy. Check that any exposed gas lines meet NEC and local code, some jurisdictions require specific materials and fittings for exposed gas piping.
Open Shelving and Minimalist Storage
Open shelving is iconic in industrial kitchens, but it’s also a commitment. Dust settles, items need to look tidy, and everything is on display. That said, it’s one of the most budget-friendly ways to achieve the look.
Materials: Use solid wood shelves (1×10 or 1×12 pine, poplar, or reclaimed lumber) or metal wire grid shelving. For a sturdier feel, go with 2-inch-thick butcher block or edge-grain lumber. Brackets should be heavy-duty, cast iron, steel pipe, or industrial-style metal corbels rated for the load. A 10-inch-deep shelf spanning 36 inches should use brackets rated for at least 50 pounds each.
Installation requires hitting wall studs (16 or 24 inches on center, typically) or using heavy-duty toggle anchors in drywall if studs aren’t where you need them. For tile or brick walls, use masonry anchors and a hammer drill with a carbide bit.
Mix open shelving with some closed storage to avoid visual chaos. Metal lockers, flat-panel cabinets in matte gray or black, or even repurposed industrial storage units keep the aesthetic consistent while hiding less photogenic items. Remove cabinet doors from existing upper cabinets as a no-cost test, if you hate the look after a month, you can reinstall them.
Skip ornate hardware. Bin pulls, cup pulls, or simple bar pulls in black or brushed metal keep lines clean. If you’re going handleless, consider touch-latch mechanisms or integrated edge pulls routed into door edges.
Choosing the Right Color Palette and Lighting
Industrial palettes lean heavily on neutrals: grays, blacks, whites, and warm browns. Accent colors, when used, tend toward muted rust, deep navy, or olive rather than bright primaries.
For walls, matte or eggshell finishes work better than satin or semi-gloss. If painting over drywall, a medium gray (Benjamin Moore Chelsea Gray or Sherwin-Williams Cityscape, for reference) pairs well with white or light wood. If keeping brick or concrete exposed, a white or off-white ceiling helps bounce light and prevents the space from feeling like a basement.
Cabinets in matte black, charcoal, or dark walnut stain anchor the look. If budget allows, consider a two-tone approach: dark lowers, open uppers. Painting existing cabinets is doable with proper prep, clean with TSP, sand lightly (120-grit), prime with a bonding primer like Zinsser B-I-N or KILZ Adhesion, then apply two coats of a durable cabinet paint (Benjamin Moore Advance or Sherwin-Williams Emerald Urethane are solid choices). Allow 24 hours between coats and a full week cure time before heavy use.
Lighting in industrial kitchens often features exposed bulbs, metal shades, and visible cords. Pendant lights over an island or dining table are classic, look for spun metal shades (like vintage warehouse or barn-style fixtures), wire cage pendants, or Edison bulb chandeliers. These typically use E26 medium-base sockets and dimmable LED filament bulbs (60W equivalent, 2700K warm white) for both style and efficiency.
Track lighting or rail-mounted spotlights work for task lighting and maintain the utilitarian feel. Under-cabinet lighting is tricky with open shelves: consider surface-mounted LED puck lights or a single strip along the front edge of the shelf if wiring allows.
Natural light matters. If you have the budget and scope, enlarging windows or adding a skylight enhances both function and mood, though this involves permitting and potential structural work. On a tighter budget, keep window treatments minimal, roller shades or metal blinds rather than curtains.
Budget-Friendly Ways to Achieve the Industrial Look
You don’t need a gut renovation to shift toward industrial style. Start with high-impact, lower-cost changes and layer from there.
Paint and refinish existing elements. Cabinet painting (as noted earlier) can run $200–500 in materials if you’re DIYing. Refinishing butcher block countertops or adding a concrete overlay to laminate counters (using a skim coat product like Ardex Feather Finish) costs under $100 in materials for an average kitchen.
Swap hardware and fixtures. Replacing cabinet pulls, faucets, and light fixtures makes an outsized difference. A good industrial-style faucet (bridge-style or single-lever with an articulated spout) runs $150–300. Pendant lights start around $40–80 each for basic metal shades.
Add open shelving incrementally. One or two open shelves flanking a window or range cost $50–100 in lumber and brackets. Pair with items you already own, white dishes, glass jars, cookbooks, to fill them without added expense.
Use peel-and-stick or affordable tile. Subway tile (3×6 white or gray) remains a staple and costs $1–3 per square foot. For backsplashes, this is a manageable DIY with tile nippers, a notched trowel, and premixed thin-set. Peel-and-stick metal or faux-concrete tiles exist but vary widely in quality, test a small section first.
Hunt for reclaimed or surplus materials. Salvage yards, Habitat for Humanity ReStores, and online marketplaces often have industrial remnants: old factory carts (repurposed as islands), metal shelving units, lockers, lumber, and lighting. A $50 metal baker’s rack can serve as a pantry or pot storage with minimal modification.
Stick to cosmetic changes. Structural work, moving walls, rerouting plumbing, upgrading electrical panels, adds thousands of dollars and permitting hassle. Surface-level updates deliver the look for a fraction of the cost and time.
Many inspiring industrial kitchen design ideas demonstrate how small, deliberate changes layer into a cohesive whole without requiring a blank check.
Safety note: When working with metal, wear cut-resistant gloves and safety glasses. When painting or using adhesives in enclosed spaces, ensure adequate ventilation or use a respirator with organic vapor cartridges (3M 6001 or equivalent). When drilling into tile or masonry, wear hearing protection and a dust mask rated N95 or better.
Conclusion
Industrial kitchen design rewards honesty, in materials, in function, and in execution. It’s a style that doesn’t demand perfection, which makes it approachable for DIYers willing to measure twice, prep properly, and embrace a little grit. Whether you’re exposing a brick wall or just swapping out hardware, the key is maintaining that balance between raw and refined. Start with one or two elements, see how they feel in your space, then build from there.