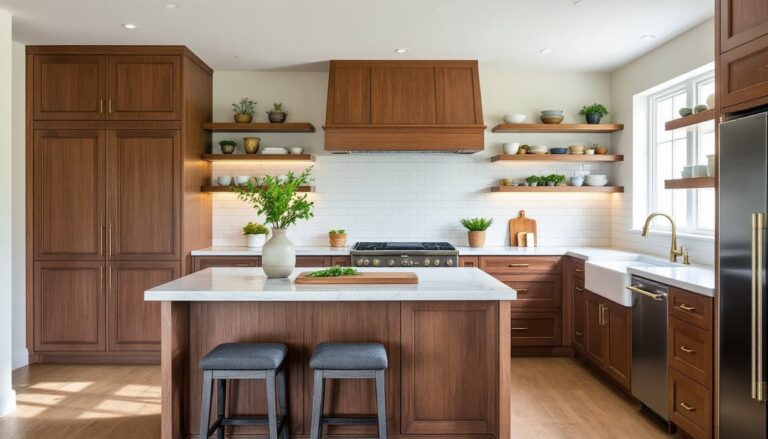

Planning a kitchen remodel used to mean endless store visits, stacks of graph paper, and a whole lot of guesswork. Not anymore. Online kitchen design tools let homeowners map out cabinets, appliances, and finishes before spending a dime on materials, or making a single cut. These digital platforms range from simple drag-and-drop layouts to full 3D renderers that show exactly how that farmhouse sink will look against subway tile. Whether you’re tackling a minor refresh or a gut job, the right software helps catch layout mistakes, estimate costs, and communicate clearly with contractors. Here’s how to choose and use a kitchen planner that actually earns its place in your project toolkit.
Table of Contents
ToggleKey Takeaways
- Online kitchen design tools catch spatial errors and dimension conflicts before expensive construction mistakes, automatically enforcing clearance rules and code compliance for appliances and fixtures.
- Using an online kitchen design tool provides real-time cost transparency by integrating live pricing on cabinets, countertops, and appliances, helping homeowners compare materials and prevent budget overruns.
- 3D visualization and rendering features in kitchen design software let you test finish choices, lighting placement, and sightlines in your actual lighting conditions before ordering materials.
- Accurate manufacturer catalogs and detailed parts lists from paid kitchen design platforms reduce ordering errors and change orders during full remodels, especially for custom or semi-custom cabinetry.
- Free online kitchen design tools work well for conceptual layouts and finish experiments, while paid platforms ($20–$200+/month) are worth the investment for major gut renovations requiring contractor coordination and permits.
- Always input exact product dimensions from manufacturer specs and respect functional clearances: 15 inches beside the fridge, 12–18 inches beside the range, and at least 42 inches between an island and perimeter cabinets per code.
What Is an Online Kitchen Design Tool and How Does It Work?
An online kitchen design tool is browser-based or app-based software that lets users create floor plans, place cabinets and appliances, and visualize finishes in 2D or 3D. Most platforms start with room dimensions, measure wall-to-wall, noting door swings, window locations, and any jogs or soffits. Users input these measurements (in feet and inches or metric), then populate the space with elements from built-in libraries.
The software handles spatial relationships automatically: drag a 36-inch range into place, and the tool enforces clearance rules from countertops or islands. Advanced platforms include real manufacturer SKUs, so that 30-inch base cabinet you’re placing matches actual product dimensions, not just nominal sizes.
Most tools export a parts list with quantities, helpful when ordering materials or getting contractor quotes. Some integrate cost databases, flagging budget overruns in real time. 3D walkthroughs let users “stand” in the virtual kitchen, checking sightlines and testing whether a pendant light will block the view to the sink. The core mechanic is the same across platforms: draw the shell, fill it with fixtures, tweak until it works, then share or print the plan.
Top Benefits of Using a Digital Kitchen Planner
Digital planners catch spatial errors before they become expensive tearouts. Place a refrigerator that swings into the dishwasher door, and the software highlights the conflict. Try fitting a 48-inch range on a wall with only 46 inches of clearance, and you’ll know immediately, no drywall demo required.
Cost transparency is another win. Many tools pull live pricing for cabinets, countertops, and appliances, letting users compare quartz versus butcher block or stock cabinetry versus semi-custom before cutting a check. Budget guardrails keep scope creep in check.
Visualization tools help non-designers make confident finish choices. Swap subway tile for hexagon mosaics with a click, or test six paint colors against the same backsplash. What looks great on a Pinterest board doesn’t always work in a north-facing kitchen with oak floors: 3D rendering shows the real story.
Collaboration gets easier, too. Export a PDF plan and email it to three contractors for apples-to-apples bids. Share a live link with a spouse or designer for feedback without scheduling a meeting. No more “I thought you meant that island” miscommunications when everyone’s looking at the same file.
Key Features to Look for in Kitchen Design Software
Accurate dimensioning is non-negotiable. The tool should accept fractional inches (not just whole numbers) and display both plan-view measurements and elevations. Check whether it accounts for base cabinet toe kicks (typically 4 inches high, 3 inches deep) and wall cabinet depth (usually 12 inches, not the 24 inches of base units).
Manufacturer catalogs matter if you’re ordering real products. Platforms partnered with IKEA, KraftMaid, or Home Depot let users drag actual SKUs into the design, ensuring the cabinet you draw is the cabinet you buy. Generic placeholders work for concept planning but fall apart at the ordering stage.
Code-aware layout guides flag common violations: a cooktop too close to a window (fire hazard), insufficient landing space beside the fridge (IRC recommends 15 inches), or a sink island without proper venting routes. Not every tool includes this: when it does, it’s worth the learning curve.
Lighting placement tools show can and pendant locations in 3D, helping users avoid the “installed recessed lights directly above upper cabinets” mistake. Some platforms simulate light color temperature (2700K warm white versus 4000K cool white) so you’re not surprised when the fixtures go live.
Export options should include high-res images for inspiration boards, dimensioned PDFs for contractors, and parts lists with quantities. A tool that only lets you screenshot the design is a hobbyist toy, not a project asset.
Step-by-Step Guide to Designing Your Kitchen Online
1. Measure the existing space. Use a 25-foot tape measure and note every wall, door, window, and obstacle. Record ceiling height, locations of electrical outlets, gas lines, and plumbing stubs. Mark which walls are load-bearing if you’re considering removal, structural changes need an engineer’s stamp and permits.
2. Input dimensions into the tool. Start with the perimeter walls, then add doors (note hinge side and swing direction) and windows (sill height and width). Most platforms snap walls to a grid: turn off auto-snap for odd angles or bay windows.
3. Place major appliances first. The range or cooktop typically anchors the layout. Add the refrigerator (check actual width, a “36-inch” fridge is often 35⅞ inches, but you need 36+ with door clearance). Position the sink under a window if possible: it’s the most-used fixture and natural light helps. According to updated 3D planning features, many modern tools now auto-suggest optimal appliance placement.
4. Add cabinetry. Work in standard widths: 12, 15, 18, 24, 30, 36 inches for base and wall units. Filler strips (3- to 6-inch blanks) close gaps. Lazy Susans and pull-out shelves go in corner bases: blind corners waste space but sometimes can’t be avoided.
5. Select countertops and backsplash. The tool should let you set countertop depth (25 inches standard, 27 inches if you want overhang for seating) and material. Edge profiles (square, bullnose, ogee) affect the final look more than many beginners expect.
6. Review in 3D and adjust. Walk through the virtual space. Is there a 42-inch aisle between the island and perimeter cabinets (minimum per IRC)? Can the oven door open without hitting the island? Does the microwave mount at a usable height (15 to 18 inches above the counter is typical)? Fix clearances and sightlines now.
7. Generate outputs. Export a dimensioned plan, an elevation view of each wall, and a parts list. Save revisions with version numbers, “Kitchen_v3_island_moved” beats “finalFINAL2_actual.”
Common Mistakes to Avoid When Using Design Tools
Ignoring the work triangle. Even open-plan kitchens benefit from a compact path between sink, range, and fridge. A total perimeter of 12 to 26 feet keeps steps minimal. Sprawling layouts look dramatic but cook inefficiently.
Forgetting about door and drawer clearance. A 21-inch dishwasher door drops down: if there’s an island 40 inches away, someone working at the island will get clipped. Cabinet doors need swing space, 90 degrees minimum. Drawers need pull-out clearance plus standing room.
Skimping on landing zones. The fridge needs 15 inches of counter on the latch side for unloading groceries. The range wants 12 to 15 inches on one side, 15 to 18 on the other for hot pots. The sink gets 24 inches on one side, 18 on the other for drying racks and prep. Many kitchen layout resources emphasize these functional clearances.
Using generic measurements for real products. A tool’s default “refrigerator” might be 36 inches wide: your actual Samsung RF23 is 35¾ inches, but the door swing adds 2 inches. Always input exact specs from the manufacturer cut sheet.
Overlooking electrical and plumbing reality. Moving a sink means rerouting drain lines, possible in a basement or crawl space, very expensive on a slab. Adding a cooktop far from existing gas lines requires a licensed plumber and inspection. The software won’t stop you from designing it, but the contractor’s bid will.
Rendering without real lighting conditions. A white kitchen looks amazing in the tool’s midday sun preset. Your actual kitchen faces north and has one small window. Test finishes in the software’s “overcast” or “evening” modes, or better yet, order samples and view them on-site.
Free vs. Paid Kitchen Design Tools: Which Is Right for You?
Free tools (IKEA Home Planner, RoomSketcher Free, SketchUp Free) work well for rough layouts and finish experiments. They’re ideal if you’re exploring whether a galley or L-shape fits better, or if that subway tile backsplash clashes with your countertop. Limitations include smaller product libraries, lower-res exports, and no customer support. If the design stays conceptual, “here’s the vibe I want”, free is fine.
Paid platforms (Chief Architect, 2020 Design, ProKitchen) start around $20/month for hobbyist tiers and climb to $200+/month for pro versions. They offer accurate manufacturer catalogs, photorealistic rendering, code-check tools, and detailed cut lists. For a full remodel where you’re ordering cabinets, coordinating trades, and pulling permits, the investment pays off in fewer order errors and change orders.
A middle path: many design platforms offer hybrid models, free basic tools with pay-per-export options. Design for free, pay $30 for a high-res render and parts list when you’re ready to bid the job.
Consider your scope and skill level. A DIY cabinet refacing project with new hardware and paint? Free tool. A $40K gut remodel with relocated plumbing, custom cabinetry, and an island prep sink? Pay for software or hire a kitchen designer who already owns it. If you’re on the fence, start free and upgrade when you hit a wall, literally or figuratively.
Conclusion
Online kitchen design tools turn guesswork into geometry and Pinterest dreams into permit-ready plans. They won’t replace a skilled designer’s eye for proportion or a contractor’s knowledge of what’s behind the walls, but they’ll save hours of back-and-forth and catch expensive layout mistakes before the saw comes out. Start with accurate measurements, respect clearances and code, and don’t skip the 3D walkthrough. When the design feels right on-screen and the parts list adds up, you’re ready to move from pixels to plywood.